As promised in my previous article, here’s my input on how to start with Codeception, how to install it and how to configure it. To do this, you have to perform 3 steps:
- Download and install XAMPP server with PHP 5.5 (You can get it from http://www.apachefriends.org/download.html). This installs PHP, Apache and MySQL for you.
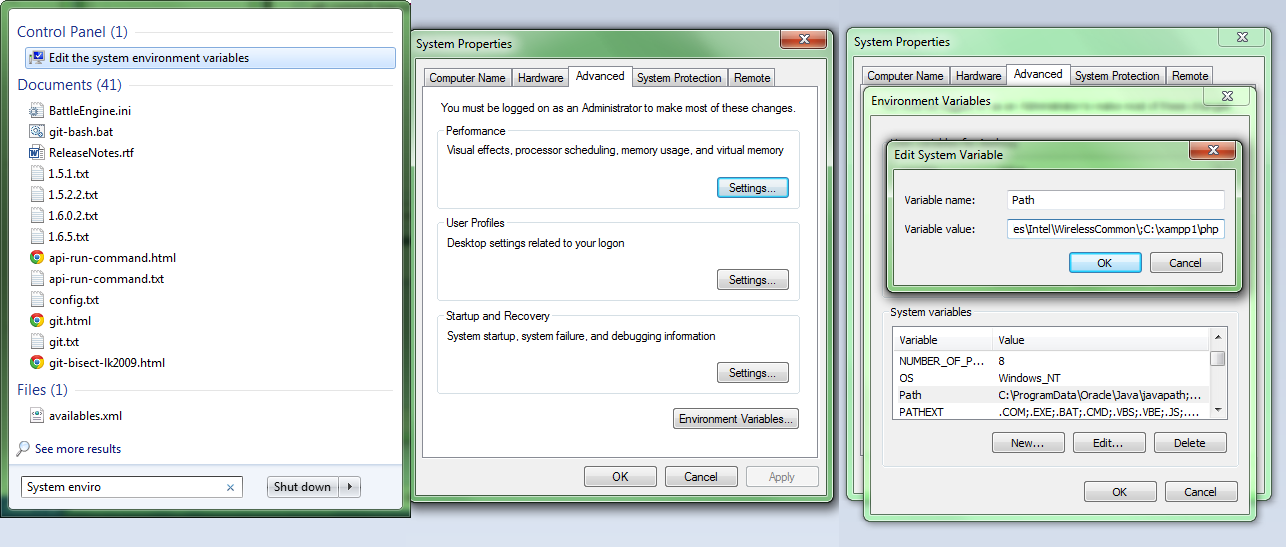
- Set the PATH environment variable to be as the path of the PHP installation of XAMPP. Make sure to leave no spaces when you set it. You just have to add C:\xampp\php at the end of the variable value.
 3. Download and move codecept.phar anywhere in your computer (from http://codeception.com/install). This will determine where Codeception will save all of your tests.
NOTE: You might also have to install Microsoft Visual C++ Redistributable, if you haven’t already done that.
That’s all you have to do to prepare your PC for the Codeception install! This will be finished once you have completed 3 more steps:
- Enter windows CMD window and navigate to where you moved your codecept.phar file (Type in “cd \qa” if you moved it in C:\qa – obviously, without the quotes.)
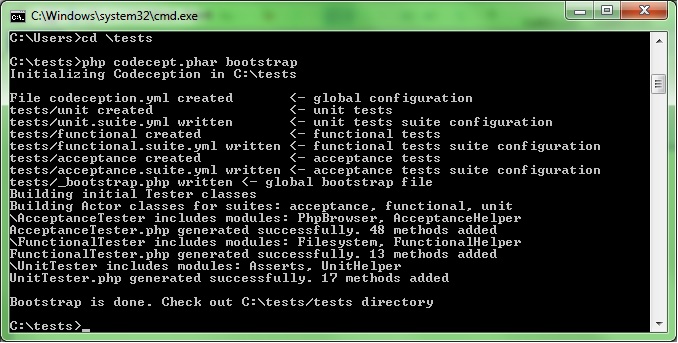
- Type in “php codecept.phar bootstrap” – this initializes Codeception in that folder. You should see something like this:
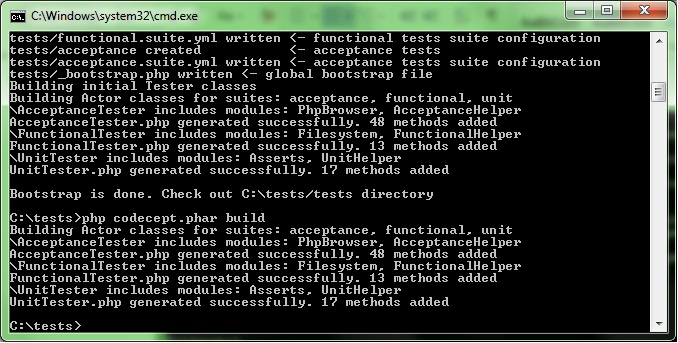
- Type in “php codecept.phar build” – this builds the test suites in that same folder. The output is this:
After doing this, you will have a new folder named “tests” added in your initial folder which contains:
- “_output”, a folder where you will find all reports and images once you start running some tests.
- “_data”, where you can store SQL dumps for test usage and the database cleanup feature.
- “_support”, where you can make custom methods to use additionally to the ones already created by default.
- Three test suites: acceptance, functional and unit. The functional and unit tests require more in-depth knowledge of PHP to be used. Therefore, we will only study acceptance tests. They offer a very wide range of testing options, so the other two aren’t really mandatory.
- A “_bootstrap.php” file where you are able to specify paths to the files that you want to load and use in your tests. (If you wrote a function in a non-test PHP file, you can add it here, and we will explain how this works later on).
- Configuration files for all of the three test suites (all of the .yml files).
Now drum roll required because you are about to write your first test!
- Configure the suite you want to use:
The default configuration uses PHP browser. Other browsers can be used, as well, but we will cover that section later.
To set the URL you want to test, open acceptance.suite.yml in any text editor (NetBeans, Aptana Studio, PhpStorm, Notepad, etc.) and change the URL line to contain your desired site. (e.g.: url: ‘http://www.gmail.com’). Be careful not to change the formats in the document, .yml files are very dependent on that.
- Generate a new test file:
Since we’re using the acceptance suite, here’s what you have to do. To create a new test file, type “php codecept.phar generate:cept acceptance testname” in cmd, in the folder where you saved the .phar. This is where you will run all of the codeception commands. When you do this, a new testnameCept.php file will be created, containing two lines of code:
$I = new AcceptanceTester($scenario);
$I->wantTo(‘Perform actions and see results’);
You can change the scope of the text by changing the value of wantTo();
- Write the code!
Here’s an example of how a test for logging in Gmail could look like:
$I = new AcceptanceTester($scenario);
$I->wantTo(‘Log in with Gmail’);
$I->amOnPage(‘/’);
$I->fillField(‘#Email’, ‘[email protected]’);
$I->fillField(‘#Passwd’, ‘qwerty’);
$I->click(‘input#signIn’);
$I->canSee(‘Inbox’);
Enter valid data in the #Email and #Passwd fields and save the file. To run the tests type ‘php codecept.phar run acceptance’. If you want to see all of the steps of the test, simply add ‘ –steps’ at the end of the command. You can also have an HTML report generated once the test ends. To make that happen, just add “ –html” at the end of the command. You will find this report in your “_output” folder.
You can find more detailed information about acceptance testing features here.
Next week we will talk about how to test on different browsers using Selenium WebDriver!
Stay tuned and subscribe to our newsletter here.
This is great. Just made the first test :)))
Pingback: Watch your tests in action with Selenium WebDriver
Really, this information is more important for me because I want to learn PHP Development course. Though this information has increased my knowledge so I am going to PHP development training institute for learns PHP. I am waiting for more facts about PHP.